


Season 3 Week 2: Explore and Expand
Ein vollständiger Betriebsplan für Woche 2 für Oasenrestaurierung, Wüstengewölbe, Rückkehr der Toten, Städte der Stufen 3-4, Handelsposten und Heldenwechsel.
Keep the Week 1 economy running, then turn it into map progress. Collect Fountain production, raise Curse Resistance for the declared city, greenify from connected territory, use every free archaeology action, reinforce the Alliance Center and treat Hero Swap as a permanent formation decision—not a free experiment.
What changes in Week 2
Week 1 established production and resistance. Week 2 adds activities that reward regular short visits, fast alliance assistance and careful map coordination. The historical rollout below is a preparation map; always obey the countdown shown in your own Season Calendar.
| Typical opening | Merkmal | Was ändert sich | Your first action |
|---|---|---|---|
| Tag 1 | Oasenprojekt | Greenification becomes a warzone and individual progression race. | Find the connected green edge and use the available Recon action on the alliance route. |
| Tag 1 | Archaeology & Digging | Personal and Alliance Vaults introduce hammers, compasses, relic patterns and help requests. | Donate to the shared unlock; collect hammers instead of spending before the vault opens. |
| Tag 1 | Return of the Dead | Seasonal enemies attack the Alliance Center in scheduled waves. | Read the announced time and reserve your strongest available reinforcement march. |
| Tag 2 | Hero Swap | Eligible UR heroes can exchange major development between one another. | Take screenshots of both heroes and preview every field before confirming anything. |
| Tag 3 | Level 3 city | The next city tier opens after the live delay. | Check resistance, connected territory, declaration ownership and attendance. |
| Tag 6 | Level 4 city | Temple of the Sun targets increase the seasonal requirement again. | Stop optional spending until the rally leader reaches the required resistance. |
| Tag 7 | Trade Posts | Cross-warzone movement and contested trade territory begin to matter. | Wait for leadership’s target, time and return plan before travelling. |

Carry the Week 1 economy forward
Week 2 does not replace the Fountain and Curse Research Lab loop. New buttons make it easier to forget the production system that pays for every later city and Stronghold.
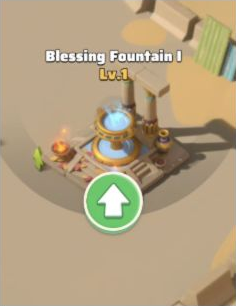
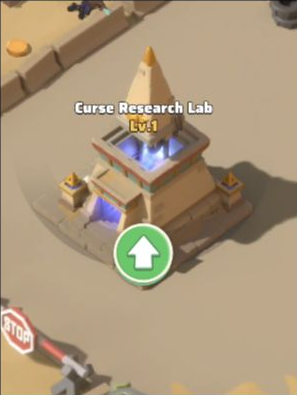
- Collect every Fountain whenever practical and start the next useful production upgrade.
- Read the next city or Stronghold resistance requirement before spending Sacred Water.
- Keep the nominated resistance leader ahead of the alliance route.
- Claim Stronghold Mithril, seasonal goals, Visitors, Desert Ruins and first-kill rewards.
- Do not let archaeology, Hero Swap or ranking pressure consume resources required for the next capture.
Week 2 day-by-day operating plan
Open the expedition
Read the live Week 2 countdowns. Donate to Archaeology & Digging, begin the Oasis Project, collect hammers and Visitor rewards, check the Return of the Dead timetable and continue the Fountain/Lab loop.
Beenden Sie den Tag mit: the shared unlock moving, no idle production and a written Alliance Center defence time.
Dig and preview
Use earned hammers on a personal Vault only after understanding the grid. Help alliance requests up to the live daily limit. Open Hero Swap and compare candidates, but do not confirm merely because vouchers arrived.
Beenden Sie den Tag mit: all free help used, a documented swap shortlist and strong marches available for defence.
Defend and take the Town
Prepare the Alliance Center reinforcement roster and confirm whether the documented Return of the Dead window matches the live announcement. Level 3 cities commonly unlock after a delay; declare only when territory, resistance and attendance are ready.
Beenden Sie den Tag mit: defence rewards claimed and the planned Town secured cleanly.
Consolidate the map
Heal, collect production, continue greenification from the shared front and review city ownership. Use personal and Alliance Vault activity quickly when time-limited opportunities appear.
Beenden Sie den Tag mit: no expiring Vault help, a connected Oasis route and the level 4 resistance target published.
Second defence window
Return of the Dead is historically documented on two weekly windows. Use the live event notice as authority. Replace weak or unavailable reinforcements, keep march slots free and avoid long gathers before the attack.
Beenden Sie den Tag mit: the highest sustainable wave cleared and rewards collected.
Capture the Temple
Level 4 cities commonly open after the live delay. Confirm Curse Resistance on the actual rally leader, adjacency, protection timers, garrison strength and the one-declaration rule before committing troops.
Beenden Sie den Tag mit: the Temple of the Sun captured without competing calls or preventable losses.
Prepare the border
Trade Posts and cross-warzone movement commonly begin at the end of Week 2. Claim weekly goals, heal, review teleport stock and wait for the published target. Preview Week 3 faction choices, Scarlett’s promotion and Schuyler’s weapon.
Beenden Sie den Tag mit: a clear Trade Post order, a safe return plan and no unclaimed weekly rewards.
Oasis Project: greenify with a purpose
The official Oasis guidance describes a shared restoration system. Captured cities establish green starting areas, and adjacent desert tiles can then be restored with Recon actions. Individual work contributes to warzone milestones and the personal ranking.
- Start from valid green land. An isolated attractive patch does not advance the route if it is not connected to a legal starting edge.
- Follow the marked direction. R4 should identify the active city area so thousands of small actions complete one zone instead of scattering.
- Use profession expansion carefully. If a live skill expands one action from 1×1 to a larger area, aim it where every affected tile contributes.
- Claim milestone rewards. Check the event page after contributing; map actions and reward claims are separate steps.
- Do not confuse Stage 1 with later restoration. Mines and Trade Posts gain additional restoration relevance from Week 5 under the documented official system.
Simple rule: green tiles are not decoration. Each action should extend a shared front, finish an area or secure an announced reward threshold.
Archaeology & Digging: make every hammer count
Vaults are timed grids. Hammers remove stones and reveal relic shapes underneath. The objective is to expose complete relics efficiently—not to clear every square.
| Item or action | Use | Operating rule |
|---|---|---|
| Archaeologist Hammer | Breaks one covered stone. | Collect from live sources such as Visitors and the Desert Bazaar; test edges and extend around confirmed relic segments. |
| Personal Vault | Your own timed relic grid. | Share a help request and use alliance assistance before wasting hammers on uncertain squares. |
| Help request | Lets allies break eligible stones and receive small rewards. | Use the daily allowance early; helping is not charity—it advances both players. |
| Desert Compass | Reveals another personal Vault. | Do not activate it unless you have the hammers and time to exploit the extra Vault. |
| Alliance Desert Compass | Reveals a cooperative Alliance Vault. | Announce it first. Every member may have a limited contribution, so activation during quiet hours wastes value. |
| Alliance Vault | Cooperative relic grid with shared participation. | Open during peak attendance and ask members to contribute promptly before expiry. |
A practical digging method
- Inspect the entire grid and any already exposed shapes before touching a tile.
- Use free alliance help first where the live interface permits it.
- Open isolated test squares with space around them; avoid beginning in a cramped corner without evidence.
- When part of a relic appears, uncover around its likely boundary rather than clearing a whole row.
- Stop once every required relic is activated and claim the Vault before its timer expires.
- Share unusual layouts with the alliance so later players recognise shapes faster.
Return of the Dead: defend the Alliance Center
This is an alliance defence operation, not an ordinary individual base siege. Community-recorded Week 2 rules describe escalating attacks against the Alliance Center, historically in thirty waves separated by roughly one minute. Your live event panel decides the real schedule and wave structure.
Before the warning expires
- R4 publishes the exact event time in server time and the alliance’s normal time reference.
- Strong defenders empty unnecessary marches and send their best suitable squad to the Alliance Center.
- Leadership checks reinforcement capacity and removes weak or incomplete marches when stronger replacements are waiting.
- Members repair, heal and refill troop counts before reinforcing.
- No one starts a long rally, gather or relocation that traps the required squad.
During and after the attack
- Watch the wave result rather than assuming the opening waves predict the end.
- Replace defeated reinforcements quickly if the live rules permit it.
- Do not pull a surviving march without an R4 instruction.
- Claim the wave rewards after the event; successful alliance defence can reward members beyond only the direct garrison participants.
- Record the final successful wave and the first failure so the next defence roster can be improved.
Level 3–4 cities and the first Trade Posts
The city plan remains a chain: connected territory, legal declaration, sufficient resistance, strong rally, fast reinforcement and controlled garrison. Week 2 punishes alliances that treat each unlock as an isolated fight.
| Operation | Before declaration | Abort or delay when |
|---|---|---|
| Level 3 Town | Verify the live Day 3 timer, route, rally leader resistance and city protection. | The route is disconnected, the leader is short on resistance or another declaration is active. |
| Level 4 Temple | Publish the higher resistance requirement early and reserve healing capacity. | Members are spending Water elsewhere while the required rally cannot function. |
| Trade Post | Choose a defendable target, invasion time, teleport area, attendance list and return plan. | The target has no strategic value, cross-warzone rules are unclear or members are improvising destinations. |
Hero Swap: decide from the finished squad backwards
Hero Swap can correct an old investment, accelerate a new main formation or rescue development locked in a hero you no longer use. It can also weaken two squads at once. Documented Season 3 versions exchange major development between eligible UR heroes; the live preview must confirm exactly what will move on your account.
Screenshot both heroes, their stars, levels, skills, gear, Exclusive Weapons and Wall of Honor state. Then compare every “before” and “after” field shown by the event. If any line is unclear, leave the screen and ask before using a voucher.
| Question | Good reason to swap | Bad reason to swap |
|---|---|---|
| Does it finish a real five-hero squad? | The receiving hero immediately enters a defined Tank, Aircraft or Missile formation. | The hero is fashionable but has no protected position or matching formation. |
| Can you equip the result? | Appropriate gear, skill priorities and Exclusive Weapon planning already exist. | You are moving stars into a hero who will remain under-skilled or badly equipped. |
| What happens to the donor? | The donor leaves the main team and the weaker resulting version still has an acceptable role. | The donor is essential to a second squad, boss lineup or defence plan. |
| Is the advantage permanent? | The swap repairs a long-term account mistake or advances the chosen main squad. | You are reacting to one battle report, one opponent or a temporary ranking. |
| Did you verify every field? | The preview clearly explains levels, stars, skills, equipment and weapon consequences. | You are relying on a screenshot from another server or an older version of the event. |
Community documentation warns that an Exclusive Weapon is not itself transferred. If a weapon-bearing hero falls below its required star level, activation can be suspended until the requirement is restored. Wall of Honor levels are also described as remaining with the original hero. Treat the live confirmation panel as final authority.
R4/R5 Week 2 command sheet
- Publish one weekly timetable: Return of the Dead, city unlock windows, Strongholds, Vault activation and Trade Post preparation.
- Mark the Oasis front: name the city or area members should extend from and discourage isolated restoration.
- Coordinate Vault activity: announce Alliance Compass use during peak attendance and remind members about help limits.
- Maintain the resistance target: post the level 3 and level 4 requirements before members spend Water elsewhere.
- Build the defence roster: list primary Alliance Center reinforcers and backups; do not rely on whoever notices the warning.
- Control city declarations: confirm adjacency, protection, ownership and rally lead before the button is pressed.
- Brief Trade Posts: choose the target, travel window, caller, rally groups, defence expectation and return procedure.
- Preview Week 3: explain faction selection, Scarlett’s potential promotion and Schuyler’s Exclusive Weapon before reset.
Checkliste für das Ende der Woche
Week 2 mistakes that cost progress
- Letting Fountains sit full because the Week 2 event screen is busier.
- Clearing every Vault stone instead of identifying relic shapes.
- Activating an Alliance Compass while most members are offline.
- Ignoring Vault help requests even though assistance also gives the helper rewards.
- Greenifying isolated tiles that do not advance the alliance route.
- Entering Return of the Dead with weak reinforcements occupying limited capacity.
- Declaring the next city before the resistance leader is ready.
- Using Hero Swap because vouchers are available rather than because the finished formation is better.
- Travelling to a Trade Post without a target, caller or return plan.
Referenzen und Nachweise
- Official Last War Support — S3 Guide: Build an Oasis (connected restoration, Recon actions, profession expansion, warzone progress and later-stage areas).
- Last War Tutorial — Season 3 Week 2 (community-recorded mission order, Vault rules, defence waves, city windows, Trade Posts and Hero Swap timing).
- Last War Tutorial — Golden Kingdom (season buildings, resources, Hero Swap caveats and Week 2 item sources).
- Game Zone Academy — Season 3 Week 1 und Kompletter Leitfaden für Staffel 3.
Evidence reviewed 28 July 2026. Exact unlock times, donation totals, wave schedules, Hero Swap fields, city requirements and cross-warzone rules can differ between releases. The live Season Calendar, event preview and alliance order always take priority.
Diese Missionsakte aufzeichnen
Ihre Vervollständigung wird privat in diesem Browser gespeichert. Melden Sie sich als Mitglied an, um sie zwischen Geräten zu synchronisieren.
War dieser Leitfaden hilfreich?
Ihr Feedback hilft uns, das nächste Update zu verbessern.